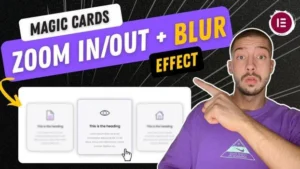
In this exciting tutorial, I’ll show you how to achieve a captivating hover effect using Elementor. By implementing a simple code snippet, you can make your cards, text containers, or buttons come to life with zooming and blurring animations. This effect adds a touch of elegance and interactivity to your website. Let’s dive right in!
- Creating the Layout: To begin, we’ll create a container and add an image box inside. With a few adjustments to the padding, background, border, and shadow, we’ll set the stage for our hover effect.
- Styling the Cards: Next, we’ll style the cards by customizing their appearance, including the border, shadow, and over animations. We’ll also define the fonts, colors, and spacing to create a clean and minimalistic design.
- Applying and Editing the CSS Code: To bring the hover effect to life, we’ll paste a code snippet provided below. This code snippet contains settings for zooming, blurring, and other visual aspects of the effect. You can tweak these values to achieve your desired level of animation.
Keep in mind that the custom CSS feature is only available for Elementor Pro users. Click here to get Elementor Pro license now!
/*Blur Zoom Hover Effect*/

selector{
    --zoom-in: 1.2;
    --zoom-out: 0.9;

}
selector{
    transition: all .5;
}
selector:hover .card-box{
    filter: blur(5px);
    transform: scale(var(--zoom-out));
}
.card-box{
    transform: scale(1);
    transition: all .5s;
}
.card-box:hover{
    transform: scale(var(--zoom-in)) !important;
    z-index: 2;
    filter: blur(0px) !important;
}
selector .elementor-widget-wrap{
    transition: all .5s;
}
selector .card-box:hover .elementor-widget-wrap{
    background: var(--hover-background) !important;
}
- Final Adjustments and Result: After applying the CSS code, we’ll make some final adjustments to fine-tune the effect. We’ll reduce the aggressiveness of the zoom and blur, ensuring a subtle and visually pleasing result. With everything in place, we’ll update the changes and witness the stunning hover effect on the front end of our website.
Conclusion: Congratulations! You’ve successfully learned how to create an eye-catching hover effect using Elementor. This effect can elevate the visual appeal of your website and engage your visitors. Feel free to experiment with different elements and customize the code to match your unique design preferences.
If you found this tutorial useful, please consider subscribing to my channel and giving this video a thumbs up. Don’t forget to share it with anyone who might benefit from it. Thank you and see you in the next tutorial!